Table of contents > Other objects
Besides the user-define nodes, Nodezator provides other objects to help make your node layout more versatile. Here we'll present each of them.
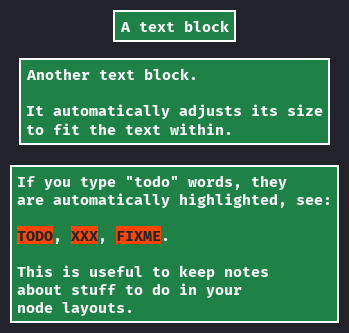
Text blocks represent comments within the node layout. To create one, just right-click an empty space on the canvas and click the Text block command on the popup menu that appears.
To edit the text, just click the text block and press <Ctrl+T>. The text blocks automatically adjust their sizes to fit the typed text, including new lines. Also, if you type "todo" words like TODO, XXX and FIXME inside the text block they are automatically highlighted. Here are some examples of text blocks in the image below:
Nodezator has a number of app-defined nodes, that is, nodes the user doesn't need to define, which come by default with Nodezator.
In the next few subsections we'll be presenting each of these nodes.
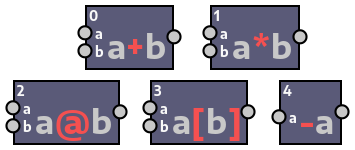
Operation nodes or operator nodes are nodes like any other, but these app-defined nodes represent the usage of operators within Python, like +, *, etc. Remember that Python has operator overloading, which means operators can have user-defined meanings, depending on the objects in the operation. This makes these nodes even more powerful.
Their appearance is a bit different of other nodes, since they have no widgets nor a header, just the operation they represent written in their bodies with a large size, with the operator character(s) highlighted in red by default.
A tiny number at the topleft corner of each node represent their unique id. Here are some examples of operation nodes:
To instantiate them, just right-click an empty space on the canvas and click one of the commands inside the Common operations submenu within the popup menu that appears. These commands are labeled according to the operation they represent, like a + b, a * b, etc.
They are just app-defined nodes which represent Python built-in functions/classes, like print, sum, etc. They look just like user-defined nodes, some even have widgets and all, but their header has a distinct color to tell them apart from user-defined nodes (by default this color is black). Here are some examples of built-in nodes:
To instantiate them, just right-click an empty space on the canvas and click one of the commands inside the Built-in picks submenu (and further separated according to their first letter) within the popup menu that appears.
They are just app-defined nodes which represent callables from the Python standard library, like itertools.chain, pprint.format, etc. Just like built-in nodes, they also look like user-defined nodes and some have widgets and all. Their header also has a distinct color to tell them apart from user-defined nodes (by default this color is black, like the built-in nodes). Here are some examples of standard library nodes:
To instantiate them, just right-click an empty space on the canvas and click one of the commands inside the Standard lib picks submenu (and further separated by the standard library module to which the callable belongs) within the popup menu that appears.
App-defined nodes which represent useful Python snippets like "with blocks" for loading or saving files. They also look like user-defined nodes, widgets and all, and their header also have a distinct color (by default this color is black, like built-in and standard library nodes). Here are some examples of snippet nodes:
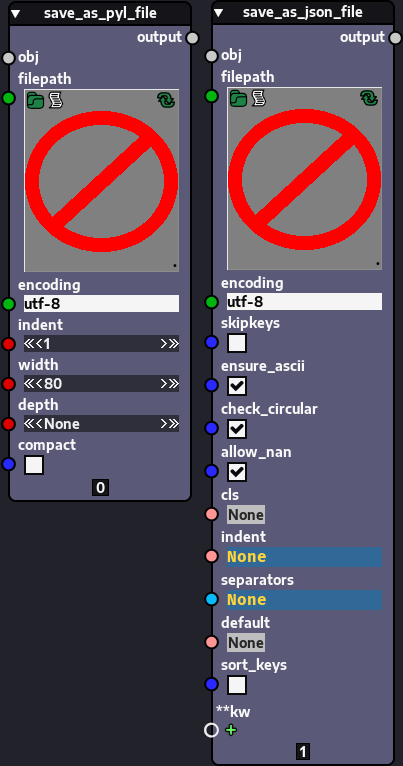
To instantiate them, just right-click an empty space on the canvas and click one of the commands inside the Encapsulations submenu within the popup menu that appears.
App-defined nodes whose only purpose is to provide data for other node(s). Data nodes represent variables within the node layout. Here are some examples of data nodes:
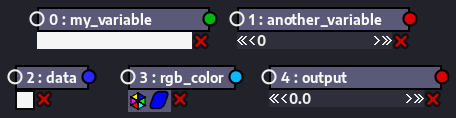
To instantiate them, just right-click an empty space on the canvas and click one of the commands inside the Data node submenu within the popup menu that appears to pick the kind of widget/data to be held by the node, including an option that presents a more complex form to specify the widget more precisely.
The default title on the data node can be changed, but it doesn't accept spaces or punctuation other than the underscore ("_"). This is so because the title of the data node is used as part of the variable name when the layout is exported as a Python script. The id of the node is used as part of the variable name as well, that is, the number to the left of the title that is assigned automatically by Nodezator.
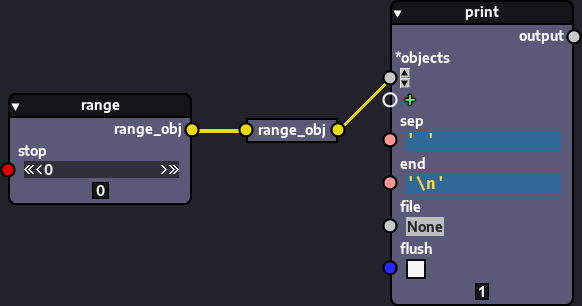
App-defined nodes whose only purpose is to connect the output of a node with the input of other node(s). They are useful for helping organize the node layout. Here's a redirect node being used to connect data between two nodes.
To instantiate them, just right-click an empty space on the canvas and click the command Redirect node in the popup menu that appears.
Viewer nodes are nodes that can be used to visualize data in the graph itself, beside the node, or, in addition to that, in visualization loops (either provided by the user or by Nodezator). General viewer nodes are app-defined nodes provided as a convenience to users. They provide visualizations for text or pygame-ce surfaces, both beside the nodes and in a text viewer or surface viewer provided by Nodezator.
To instantiate them, just right-click an empty space on the canvas and click one of the commands inside the General viewer nodes submenu within the popup menu that appears to pick a general viewer node. The image below shows all 04 general viewer nodes available.
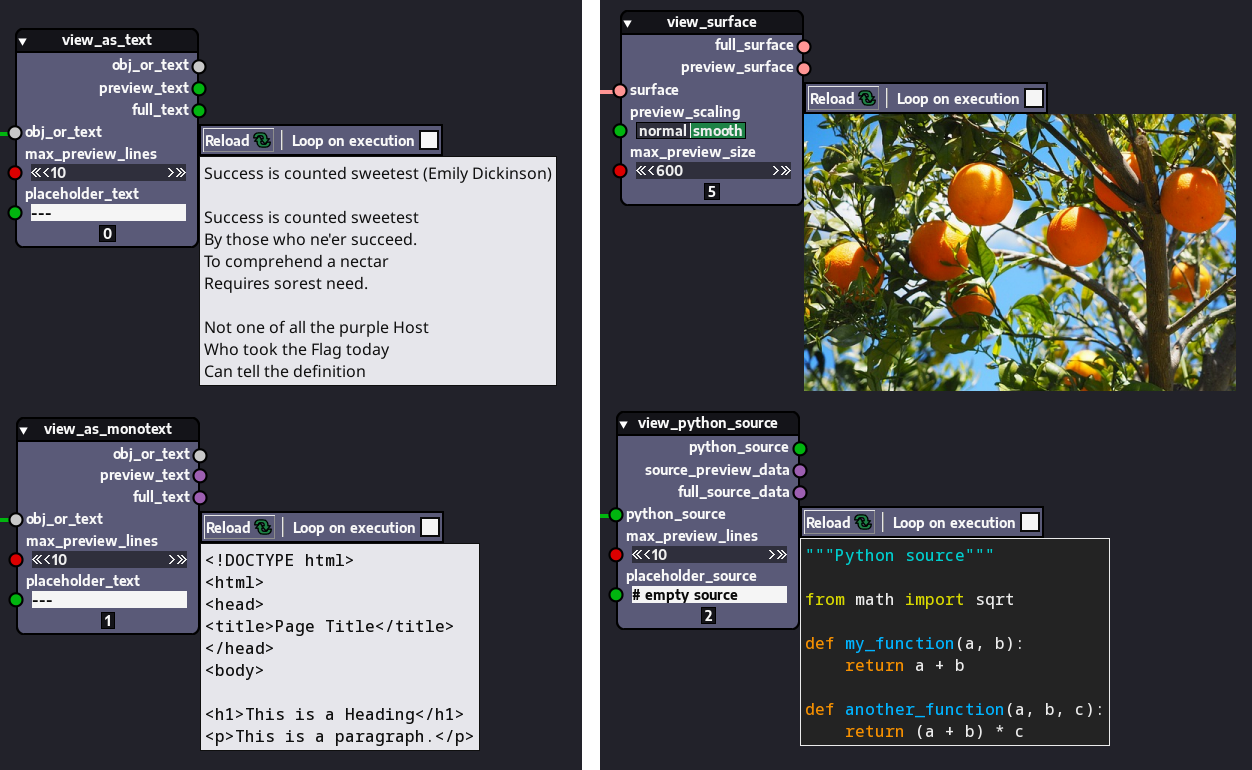
Original orange tree image by Hans can be found here.
You can learn more about viewer nodes in the introductory chapter on viewer nodes. The appendix with recipes for common tasks in Nodezator also has a recipe regarding viewer nodes.
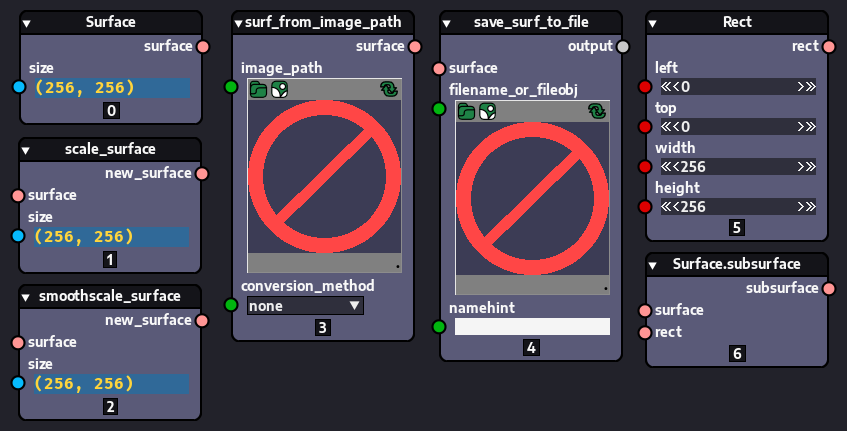
Pygame-ce nodes are nodes that represent callables imported from pygame-ce or encapsulations of custom actions performed with them. All of them represent actions to create or manipulate surfaces, or to help is such actions.
To instantiate them, just right-click an empty space on the canvas and click one of the commands inside the pygame-ce submenu within the popup menu that appears to pick a pygame-ce node from the available submenus. The image below show some of them, but there are many more.
If you connect data to the input socket of a data node the data node changes its meaning (it doesn't represents a variable anymore) and becomes a redirect node. In such case, the node serves only to redirect the received input and it is as though the widget doesn't exist (the widget is hidden). If you sever the connection to the input socket, the node becomes a data node again and the widget reappears (unless there was no widget to begin with, in which case a button shaped like a plus sign "+" appears, which you can use to add a widget to the node).
If you delete the widget of a data node by clicking the small "x" icon to the right of the widget, it will be useless until you add a widget again or turns it into a redirect node by connection data to its input socket.
As explained before, user-defined nodes have 03 different modes, that is, expanded signature, collapsed signature and callable modes. Just like user-defined nodes, app-defined nodes based on callable objects also have such modes. The only expection are operation nodes, which don't have a collapsed mode, because they are too tiny already.